Showing posts with label tips. Show all posts

5 reasons to go hiking as a new parent


I've seen so many couples that love to hike, yet when the new baby arrives, they stop doing this activity they love. It doesn't have to be that way. In fact, there are tons of reasons for going hiking as a new mom or dad. 

1. Putting the baby to sleep

Nothing puts a baby to sleep like the gentle rocking of your body while you're hiking, listening to your heartbeat and watching the trees go by. My newborn would fall asleep on every hike and sleep exceptionally well.

2. Helping to lose the baby fat 

Moms, our body changes after giving birth. It's normal to have belly flab—in fact, people were asking me if I was pregnant a full 1 year after giving birth! But if it makes you feel better, you can go on a hike and try to burn off the "leftover packaging". Here's to getting that body back! 

3. Feeling like your old self

When you become a parent, you become so focused on your newborn, that you become 100% parent, and in a way, you lose your old identity. It can be stressful and frustrating to have a completely different lifestyle and not do any of the things you used to do before you had a baby. Go for a hike! You'll feel amazing and feel like your old self again.

4. Cultivating a love for nature in your child 

My daughter is now 2 and she thinks hiking and spending time in nature is a normal part of life, and she loves the outdoors. This might not have been the case if we hadn't been going hiking regularly since she was a baby.

5. Stay healthy 

Of course, all of the other reasons to go hiking, that don't have anything to do with being a new parent, still apply! You get to breathe fresh air, spend time outdoors, get exercise, and feed your soul by being in nature!

What to take with you

So, if you've been craving to get outdoors, just do it! And don't forget to take, on top of your normal hiking gear:
  • ring sling or soft shell baby carrier
  • sunhat for the baby
  • umbrella for shade (babies should not wear sunscreen)
  • breastfeeding cover + nursing top or bottled formula (whichever applies)
  • extra diapers and wipes
  • diaper changing mat or blanket

Happy hiking!

Baby's first hike

How to score big on the REI Used Gear Sale


Today was my second time at the REI Used Gear Sale (which is now called REI Garage Sale). In total, from these two sales, I've scored some amazing finds:

Like-new REI Quarter Dome 3 tent for $139 ($200 new)
Like-new Merrell minimalist running shoes for $52 ($100 new)
Gently used Osprey Poco Plus child carrier for $125 ($260 new)
Patagonia down jacket for $70 ($160 new)
ENO double deluxe hammock for $26 ($85 new, missing carabiners and knots undone)
Used double layered socks for 83 cents ($8 new)
Used cap for $7 ($22 new)
Like-new base layer for babies for $12 ($25 new)

That's savings of $430, or 50%!!! Obviously some items, like tents, backpacking backpacks and GoPro cameras, have high demand and you have to have a strategy to snag the ones you like. Here are my tips for scoring the best deals:

1. Do some scouting beforehand

Visit the REI store on the previous night and see where they've kept everything. Different stores do it differently; some keep items on racks in their parking lot, some block off one part of the store, and others spread items out in marked boxes in their respective departments (tents in the tent section, shoes near the shoe section, etc.) Try to remember the general areas where your top coveted items are placed.

2. Have a "wishlist"

Do your research beforehand and check reviews for your top most-needed items. For example, I know I wanted a 3- or 4-person tent. So I wrote a list of all the tents at REI that I would take, if they had it on sale. I had my first choice, second choice, etc., so I didn't have to waste time thinking about which one is better, having to look up ratings on my phone, etc.

3. Bring a BIG shopping bag

I prefer IKEA shopping bags, they're huge and strong enough to fit tons of stuff. You definitely need it, too -- see #6.

4. Get there early

Some stores only let in small groups or people in at a time, thus preventing a huge crowd and chaos, and also rewarding the early birds. If necessary, camp out... but make sure that you know what system the store will be using. You don't want to camp out overnight or stand in line at 4am, only to find out that everyone gets let in at the same time. And when you do get in, make a beeline towards your first-choice items.

5. Work as a team

Have a partner or go with a small group, so that after everyone has picked out their top choice items, you can all sort through your pile and return to the bins at your leisure, while someone guards the pile at all times.

6. If you're considering getting it, hold on to it

Don't pass something by, thinking you can get back to it. Chances are, someone else will have taken it. Grab it first, and decide later if you really want it.

7. Beware the impulse buy

Items bought at the REI Garage Sale cannot be returned, so don't buy junk just because it's cheap. Make sure you're buying stuff that you will actually use.

8. Go back for seconds

Later on, people will be putting back items they decided not to buy. So you can often score some great finds after the initial mad rush has ended. That's how I got the ENO hammock! Go back, check the bins and racks again for items you're still missing from your wishlist, and walk around the store to check out the little piles that people have left scattered around.

Do you have other tips on what strategies to use? What were your experiences at the REI sale? Share in the comments! Good luck and happy shopping!

Beginner Backpackers: Dos and Don'ts

It great to see beginner backpackers first experience the joys of backcountry camping. Unfortunately, I've seen them do too many mistakes that would have been easy to avoid, had they gotten a proper intro lesson. Here is my main list of Dos and Don'ts for beginner backpackers.

DON'T invest a lot of money into gear

Especially if this might only be a once-in a while thing and you don't plan on going backpacking every season. You can rent everything you need, e.g. a backpack or stove, for a whole weekend from stores such as Sport Chalet at a tenth of the cost of buying gear. (If you go backpacking once a year for 10 years, renting is still the cheaper option!) Or ask around if anyone has extra gear that you could borrow.

DON'T wear heavy hiking boots

If the trail is well maintained, the distance of your first backpacking trip probably won't be long enough to really strain your ankle. You could wear the same shoes you would wear on a dayhike unless your ankles are prone to injury or your backpack is insanely heavy (but if this is the case, you're probably doing something else wrong..! See my next four points).

DON'T bring heavy jars or cans or too many fresh, juicy fruits and vegetables

One or two fruits are fine, but leave these behind in favour of things like dried fruits, trail mix, and calorie-dense foods such as cookies, crackers, bread and chocolate. I normally eat really healthy, but backpacking is where you really want to save on weight, plus you can survive for a day without fresh fruits and veggies anyway! I'd carry max a few carrots.

DO repack foods

Measure out single-serving portions of cereal, cheese, etc. into ziplock baggies. The biggest no-nos I'd seen were glass jars of peanut butter and nutella where you only use 1 spoonful.

DO bring easy-to-cook or no-cook meals

If you like a warm meal, "instant" foods are great, e.g. noodle soup where you just add boiling water, or the packets of Indian curries that you just heat up and eat with pita bread. Oh, and hummus and pita always tastes great! But really plan out what's for breakfast, lunch and dinner, otherwise you'll be carrying a lot of extra weight back.

DO pack light

This will largely depend on the weight of your "big 3", the backpack, tent and sleeping bag. But other than those, really you only need to bring food stuffs, toiletries (again, repack... think travel-size!), a warm sweater for the night and a single change of clothes. Skip the comforts you would normally carry while car camping, e.g. books, camping chair or games. I bring a warm sweater but leave my jacket because if I get cold, I can just bundle up in my sleeping bag. :) Other tips: bring a plastic teaspoon instead of a metal tablespoon; bring a metal mug that can be re-purposed as a cooking pot and a food bowl... you get the idea.

DO bring enough water and/or a water filtration method

Find out if there are any springs along the trail. If there are, bring less water and filter/sterilize along the way. Iodine is cheap but sometimes inconvenient. A water filtration system can be expensive, so try to find out if anyone in the group is bringing a water filter to share.

DO pack your backpack according to an ideal weight distribution

Light stuff goes on the bottom (sleeping bag), heavy stuff on top and as close to your back as possible. You can tie your foam sleeping pad on the outside. Last but not least, when you start the trip, ask someone to check whether your straps are properly tightened. Most of the weight should be on your hips, not on your shoulders.

Coming soon I'll post a basic packing list, and also give you a glimpse into what I pack in my own backpack. Do you have any other tips to share? Post in the comments!

Pine chewing gum

During a hike in the Sierras, I found a some pines with huge chunks of fresh sap. I remembered that when I was little, I had read in The Sign of the Beaver that you can chew the sap into a chewing gum. So I tried it for myself!

The sap wad was still soft on the inside, but with a firm crust.

I took a wad about the size of a large gumball and started chewing. In the beginning, it wasn't very pleasant, it stuck into my teeth and tasted bitter with a strong pine taste. My hiking partner thought I was crazy.

After about 30 minutes, I got "proper" gum. It was stretchy, no longer stuck to my teeth and had a more pleasant, mild pine taste. If you try this yourself, keep in mind that you'll need a lot of patience!

The pine gum is pretty stretchy. You can't blow bubbles, though.

 Share your experiences or other cool on-the-trail snacking tips in the comments!

Benefits of a post-work weekday hike

After hiking with a friend after work, I felt so great and refreshed. It made me think about how many benefits hiking has, and more specifically, the fact that you're ending your day with a hike.

1. Stress relief

It's important to get your mind off work and the stresses of everyday life. Being in nature has a meditative effect and allows you to wind down mentally after a hard day at work.

2. Social bonding

This is a great time to reconnect with friends who live nearby, yet you never seem to have time to meet up with. If you both love hiking, this is a perfect way to bond, and you'll be able to hear each other better, too, than if you had gone to happy hour at a noisy bar to chat.

3. Exercise

If you're the average worker, you spend over 8 hours sitting per day, and you need to get the blood flowing in your legs! This infographic did an excellent job of remind me that sitting is literally killing us. Also, you'll be strengthening knees and ankles, getting in your required bit of cardio per day, and losing weight (if you need it... just don't use the hike as an excuse to go overboard for dinner).

4. Fresh air

This is something you rarely have access to in smoggy Los Angeles, where I live. No other exercise I can think of matches hiking in this regard: you get to escape from the car exhaust on the streets and breathe fresh air for an hour an a half. Woohoo!

5. Boost your mood

The boost of endorphins in your brain is a side effect of exercising, and not something to take lightly, especially if you've hard a hard day at work. After all, the end goal of life is to be happy.

6. Sense of accomplishment

Everyone has those days where you feel like you didn't get anything done at work. Well, this is your chance to make up for it. This is something you're doing for the long-term benefit of your physical and mental health.

Of course, there are a many other positive effects of hiking on a regular basis, and of aerobic exercise in general. Live longer, increase your stamina, reduce your health risks, and boost your immune system, just to name a few. The above six points are merely the ones that I felt were specific to the benefits of going hiking after work, as opposed to during a weekend, when you're generally more relaxed and spending time going out with friends, anyway.

Do you have any time management tips for squeezing in a hike after work? Share them in the comments!

The Narrows, and why I wouldn't do it again

A friend of mine got permits to backpack The Narrows in Zion National Park in Utah, top down. This was a rare opportunity, and of course I was in! Unfortunately, most of the people in the group were new to backpacking, and we didn't do the best job packing the group food. Everyone ended up carrying glass jars, heavy fresh fruits and vegetables, and about three times the amount of food we really would have needed to carry, overall. That added weight then led to a large fraction of the group busting out their knees and ankles, and the remaining people were left to carry the weight of the injured's packs. By the time we got to the most beautiful part of the Narrows, we barely had the strength to look up, let alone take pictures. I still managed to get a few good shots, though.

The Narrows

Waist deep in the Narrows

I would do the Narrows again, just not like this. Lessons learned:
  • Give your fellow novice backpackers a lesson on packing lightly. Otherwise, you'll get stuck carrying their gear and extra food when their legs give up!
  • Do the Narrows as a bottom-up day hike. You'll get to see the most beautiful parts but save the time and energy needed for a 2-day backpacking trip. It's a different story when you're backpacking in order to get to a place you wouldn't be able to get to otherwise.
  • Put all of  your gear into a dry bag. That way, in the deeper parts of the river, you can simply lie onto your backpack and use it to float downstream. Pure bliss...
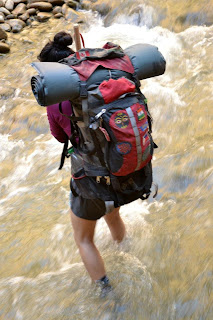
Backpacking river crossing

Have you hiked the Narrows? How would you recommend hiking it? Post in the comments!

Beginner's Tips on Snow Camping


I just went on my first snow camping trip and it wasn't as hard as I thought. In fact, this was the first time I wasn't cold at night! (On summer backpacking trips in the mountains, it's always colder at night than I expect, but this time I was prepared for cold.) Read on for some beginner's tips for snow camping. I highly recommend everyone to try it!

Gear and preparation
  1. Walking in the snow is not a big deal. Just rent snowshoes from any sports store such as Sport Chalet for about $25 for 3 days.
  2. Bring two foam pads for extra insulation.
  3. The rating of your sleeping bag is the temperature at which you can survive. It's not the temperature at which you'll be comfortable. Bring a sleeping bag that's rated for about 20°F colder than the lows for the night, and if your sleeping bag isn't warm enough, bring two of them.
  4. Cotton kills. Make sure you have synthetic fibre clothing as your base layer, as well as your insulation layer.
  5. Igloo in forest
    This was fun to build, but I would not
    recommend sleeping in it.
  6. Buy a balaclava. It's amazing how much warmth they provide. Wear them to sleep, andif you don't mind looking sillyin the morning before you have a chance to warm up. I bought my Wickers balaclava (midweight) for only $6.
  7. Store your water bottle upside down. Since ice forms at the top first, the mouth of the bottle will never freeze over.
 Setting up camp
  1. Pick a spot that's sheltered from the wind, but not in a valley, because cold air sits in the valleys.
  2. If the snow is deep, dig a trench around the place where you plan to set up your tent. Pile the snow into the middle, then trample it all down. The key is to have a trench around your tent, so cold air doesn't sit in the hole where your tent is. Extend the trench sloping down away from your tent, like an entry pathway. This will be the escape path for the cold air.
Sleeping
  1. Before you go to bed at night, fill your bottle with hot water. When in the sleeping bag, place it between your thighs for extra warmth.
  2. Keep chocolate within arm's reach in your tent. The boost in calories will warm you up if you wake up cold in the middle of the night.
  3. Put all of the clothes you plan on wearing the next day by your feet, inside the sleeping bag. Not only will it provide extra insulation, but you'll avoid having to get into freezing cold clothes in the morning.
  4. Don't forget to wear your balaclava to bed.
Camping tents in snow

Do you have any more tips for beginners? Share in the comments!